TL;DR:
If you create content on the go, choose a compact audio interface with sufficient mic inputs, stable drivers, a robust headphone amplifier, and loopback capabilities for streaming. Aim for 24-bit recording at 48 kHz, set buffer sizes sensibly, and use direct monitoring for zero-drama sessions.
Key Takeaways:
- Pick I/O for your workflow: one or two mic inputs, loopback if you stream.
- Favour stable drivers, a solid headphone amp, and direct monitoring over flashy extras.
- Record at 24-bit/48 kHz, set sensible buffers, and leave sufficient headroom when adjusting the gain.
- Save a session template and keep cabling tidy to avoid setup hassles.
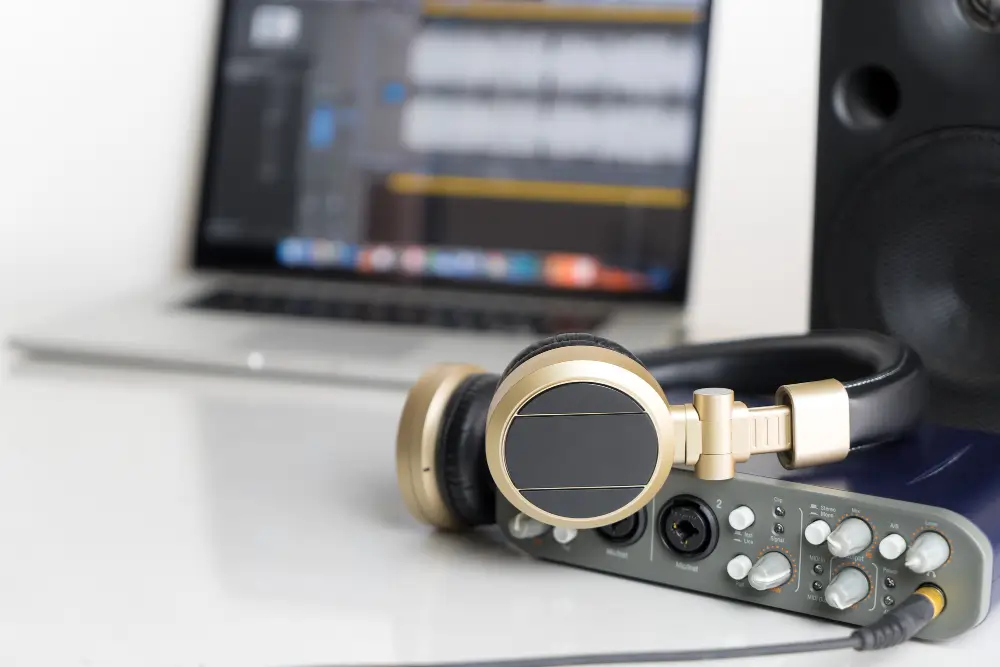
Compact audio interfaces have become the default hub for modern creators. Whether you’re recording a podcast at home, streaming from a laptop, tracking vocals in a small studio, or producing social clips on the road, a pocket-sized USB box can deliver clean sound, reliable I/O, and fuss-free setup. The challenge is choosing one that actually suits your workflow.
This guide explains how to assess options without getting lost in marketing. We’ll cover what matters most, how to match features to real use cases, and a simple setup checklist so you can hit record with confidence. If you’re searching with “compact audio interface buy” in mind, this is the practical short list you need before you spend a dollar.
What a compact audio interface does (and why you need one)
An audio interface converts microphone and instrument signals into digital audio that your computer or phone can record, and converts your mix back to headphones or speakers. A compact interface does that in a small, bus-powered unit, usually over USB-C, with essentials like:
- Mic preamps with phantom power for condenser mics
- Instrument/line inputs for guitar, bass, synths, and drum machines
- Headphone output with its own volume control
- Balanced speaker outputs for studio monitors
- Direct monitoring so you can hear yourself with near-zero latency
Compared to USB mics or built-in laptop inputs, a compact interface offers better gain control, cleaner conversion, and flexible routing—without requiring a mixer on your desk.
The buying factors that actually matter
1) I/O you’ll use — not just specs on the box
- Solo creator or VO: One good mic preamp, one headphone out, stereo monitor outs.
- Two-person podcast or singer-guitarist setup: Two mic preamps (separate gain knobs).
- Hybrid sources: A pair of combo XLR/¼-inch inputs covers most mics and instruments.
- MIDI requirements: Some small interfaces feature 5-pin MIDI in/out ports, while others rely on USB MIDI devices. If you have older synths, the built-in MIDI feature is a handy addition.
If you regularly host guests or record instruments and vocals at once, it’s smarter to buy two mic inputs now than to juggle adapters later.
2) Preamps and phantom power
Modern preamps in reputable interfaces are clean and quiet. What varies is the gain range and headroom. If you use low-output dynamic microphones for speech, look for a solid gain setting so you don’t need to push the noise up. Ensure that 48 V phantom power is available for condensers and that it’s switchable per channel, if possible.
3) Headphone amp strength
A weak headphone amplifier makes monitoring difficult, especially with higher-impedance studio headphones. Check that the interface drives your headphones clearly at a comfortable level, without maxing the knob.
4) Drivers and latency
Low, stable latency ensures natural performance, particularly for software monitoring, virtual instruments, and live streaming. On macOS, Core Audio is usually plug-and-play. On Windows, install the maker’s ASIO driver. For iPad and many phones, look for “class-compliant” support over USB-C.
5) Loopback for streamers and hybrid calls
Loopback lets you route computer audio (such as Zoom, backing tracks, or game audio) back into your recording or stream. If you go live, teach online, or record remote interviews, loopback is a must-have.
6) Power and portability
Bus-powered units keep your bag light. For recording on an iPad or phone, you may need a powered USB-C hub if the device can’t supply enough current—especially when phantom power is enabled.
7) Monitoring and metering that reduce mistakes
A direct monitor knob or switch allows you to hear the input signal without it being routed through the computer. Clear metering (LEDs or a small screen) makes it easy to set gain and avoid clipping.
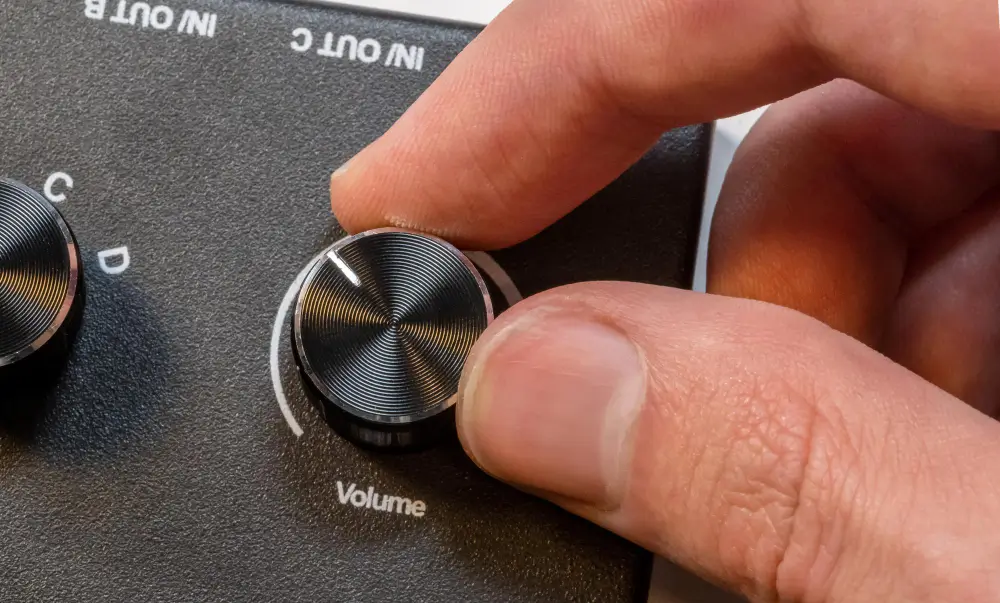
8) Build dials and desk fit
If you plan to travel, a metal chassis and secure knobs help. Consider the location of the headphone jack and volume knob—top-panel controls are easier to adjust mid-session than rear-panel dials.
9) Sample rate and bit depth
For most creators, 24-bit at 48 kHz is the sweet spot. It gives ample headroom, plays nicely with video, and keeps CPU use sensible. Going higher is rarely audible for speech and general content, but can increase file sizes and strain.
Match the interface to your workflow.
Solo podcaster or voiceover
- Inputs: One clean mic preamp with phantom power
- Must-haves: Direct monitoring, solid headphone amp, mute switch if you present live
- Nice-to-haves: Loopback for remote interviews, tone control or low-cut on the input
Two-host podcast or singer-songwriter
- Inputs: Two mic preamps with independent gain
- Must-haves: Separate headphone levels or a simple way to feed both hosts
- Nice-to-haves: Dual USB streaming or mix-minus options if you run calls often
Streamer or online teacher
- Inputs: At least one mic plus a line input for instruments or a second source
- Must-haves: Loopback, easy mix control between mic and computer audio
- Nice-to-haves: Onboard DSP for noise reduction or EQ, or at least a low-cut filter
Mobile creator on phone/tablet
- Inputs: One or two, bus-powered
- Must-haves: Class-compliant USB-C, efficient power draw
- Nice-to-haves: Hardware direct monitor, compact footprint, short right-angle cables to keep the rig tidy
Guitarist or bassist
- Inputs: One Hi-Z instrument input, plus a mic if you also track vocals
- Must-haves: Low-latency monitoring for amp sims, a pad or healthy headroom
- Nice-to-haves: Re-amp-friendly routing or line outs to hit pedals/amps
Producer with small hardware rigs
- Inputs: Combo jacks with line-level support for synths and drum machines
- Must-haves: Balanced monitor outs, stable clocking and drivers
- Nice-to-haves: MIDI in/out to sync older gear, a second headphone out for collaborator sessions
Sound quality: myths vs reality
Myth: Higher sample rates always sound better.
Reality: For spoken word, streaming, and most music projects in small rooms, 24-bit/48 kHz is more than enough. Room acoustics, mic choice, and technique matter more than huge sample rates.
Myth: preamp brand is everything.
Reality: In compact interfaces from reputable makers, preamps are already very clean. What you’ll notice most is enough gain for your mic, and smart gain staging so you avoid clipping.
Myth: Zero noise is the goal.
Reality: A touch of steady noise is less distracting than artefacts from over-processed denoising. Prioritise clean capture and a sensible recording level. You can tidy the rest in post with light-handed tools.
Features that save real time
- Auto gain or gain range presets Help beginners quickly set levels.
- Input low-cut filter: Rolls off rumble from footsteps and air-con.
- Hardware mute: Essential for live sessions and eliminating background noise, such as coughs.
- Pad: Stops hot signals from clipping.
- Top-panel master knob: Faster than scrabbling behind the unit mid-take.
- Colour-coded rings or LEDs: Make it obvious when you’re in the red.
Compatibility and device checks
- Operating system: Confirm current macOS/Windows support; download the maker’s driver for Windows.
- iPad and phones: Look for class-compliant support. Some Android devices need OTG mode.
- Power budget: Two phantom-powered mics can push bus power limits on tablets—use a powered hub if things glitch.
- DAW support: Any mainstream DAW will work. If you’re new, free or low-cost options are fine to start with.
- USB-C cables: Short, sturdy cables reduce desk snags and connection drops.
Budget planning (and the hidden bits people forget)
The interface is one line in the budget. You’ll also want:
- One XLR mic cable per mic
- A stand and pop filter for voice
- Closed-back headphones for tracking
- TRS cables for monitors or external gear
- A simple desk riser or tray so the interface’s knobs are easy to reach
If you’re upgrading from a USB microphone, plan to learn basic gain staging and monitoring techniques. It’s a small curve and worth it.
Quick start: setup checklist for clean results
- Connect and install
Plug the interface into a USB-C port. On Windows, install the ASIO driver. On macOS and iPad, class-compliant devices usually just work.
- Project format
Set your DAW to 24-bit/48 kHz.
- Buffer size
Start at a moderate buffer (for example, 128–256). If you hear clicks, raise it; if latency feels too slow while playing live instruments or singing through plug-ins, lower it.
- Direct monitoring
If your interface offers it, use direct monitor for zero-drama tracking. Blend with computer playback to taste.
- Gain staging
Speak or play as you would in the take. Raise the preamp until peaks hit healthy levels without clipping. Leave headroom. If you’re using a condenser, switch on 48 V and give it a few seconds to stabilise.
- Test record
Capture 10–20 seconds. Listen back on headphones and speakers. Check for hum, clicks, and room echo.
- Name inputs
Label channels in your DAW (e.g., “Mic 1 Host,” “Mic 2 Guest”) so future sessions open ready to go.
- Save a template
Create a basic project with your routing, track names, and favourite filters loaded. Next time, you’re recording in a minute.
Common questions
Do I need two mic inputs?
If you host guests, sing and play the guitar simultaneously, or share a desk, then yes. Otherwise, one quality input does the job.
Is loopback only for gamers?
No. It’s great for teachers, podcasters, and anyone recording remote interviews or demos with system audio.
Will an interface improve the sound quality of my USB mic?
Not directly. Interfaces are for XLR mics and instruments. If you’re hitting the limits of a USB microphone, upgrading to an XLR microphone with a compact interface is a solid option.
What about Thunderbolt?
Thunderbolt can offer lower latency on some pro units, but for most creators, a good USB-C interface is more than fast enough.
Buying pointers to avoid regret
- Plan one step: If you plan to add a second mic soon, buy two inputs now.
- Prioritise drivers: A simple interface with rock-solid drivers beats a flashy one that glitches.
- Check return policy: Helpful if your headphones reveal a hiss you didn’t hear in store.
- Read the manual once: You’ll find hidden switches (pads, low-cuts, loopback toggles) that make life easier.
- Keep it tidy: Short cables, a small stand, and a labelled template do more for daily sanity than niche features you’ll never touch.

Ready to keep learning?
Get simple, practical tips on capture, cleanup, and publishing—written for creators, not just audio engineers.
Subscribe here: https://argine.net/